Sunday, July 24, 2016

Momma said there'd be days like this....


We have a 'rule' at our house that goes something like this.....don't start anything after 9:00 PM.  That means we don't start cooking, watching a movie, or balancing the checkbook after that time.  Well, I violated that rule last week as I was excited to get into my craft space and create some cards. (Love how Stampin' Up makes you think that way.). 
 
I had worked the previous evening on using some of my old non-SU paper to make some cards.  Let me tell you, there are not enough words to describe the difference in great paper (SU) and not so great paper - but I'll try all the same:
 
  • Great paper doesn't tear after it has been scored
  • Great paper doesn't allow the inks to bleed, giving a messy result
  • Great paper allows beautiful ink  colors to retain their integrity
So, with that being said, your paper quality makes all the difference in the finished product.


Once I learned my lesson about paper quality, it was on to creating more cards.   I love the Swirly Bird Stamps and Thinlit Bundle.  It is going to be so much fun creating with these.


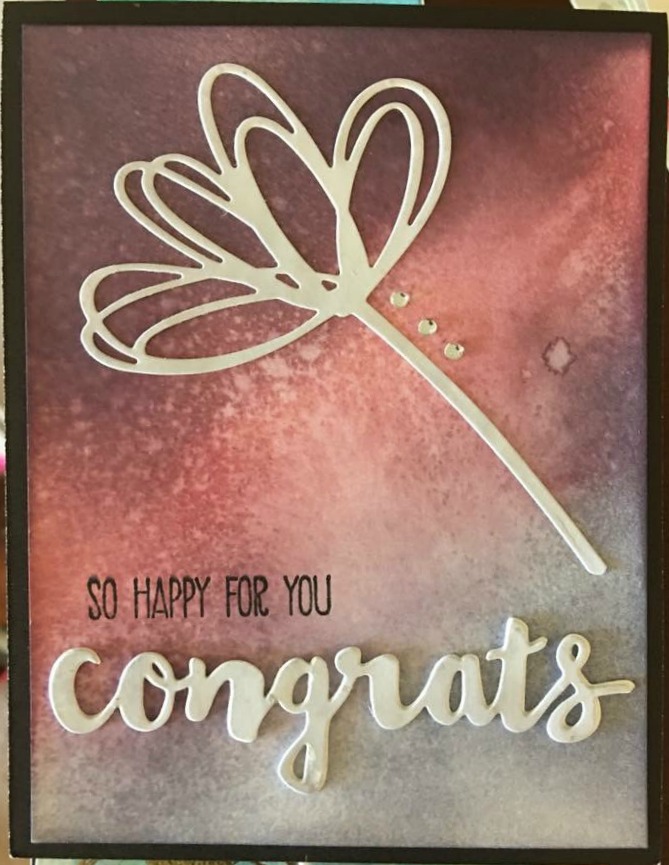
My next project was with the Sunshine Sayings Stamp set.  So clean, so simple, so elegant.  I combined it with another set for a thankful sentiment.  I tied around the sentiment, some bakers twine from my stash.  Loved it so much that I made a second one.   But, that's when the troubles began.  


Links to order these stamps are at the bottom of this post.  Please click through to order from my website.  
 
As you can see, with my excitement, some things were misplaced.  Typically, you can correct those mistakes if you find them as soon as you make them.  But, I  didn't notice it until the next morning.  So, one of my lucky friends will be getting this 'special' card.  Wonder who it will be?

Until next time....happy crafting!  ðŸ˜„   Next Up - Two card kits.  I will time myself making these and let you know the results.  Should be fun!!

P.S. - I'm working on my formatting skills.   Hope to be better soon.  

Swirly Bird Photopolymer Bundle   Swirly Bird Photopolymer Stamp Set   Swirly Scribbles Thinlits Dies
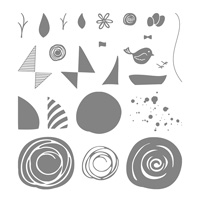
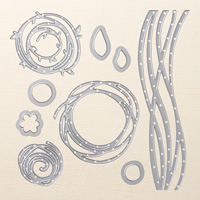
Swirly Bird Bundle                            Swirly Bird Stamps                   Swirly Scribbles Thinlits Dies


Sunshine Sayings Clear-Mount Stamp Set
Sunshine Sayings

Sunday, July 10, 2016

The Big Reveal...

I finally remembered to add this photo to my blog   It is my first SU swap.   There were some exquisite samples in the Paper Made Prettier swap this month.  My work is cut out for me - that's for sure.  


How many people can say they had fun at a training session?  I did on Saturday at our team training event.   Kay, Elizabeth, Patience, and Cindy did an awesome job with everything.  Thanks!!


After I finished my swap cards, I made a few more while I had the ink and stamps out. These two feature the Watercolor Words Stamp Set.  So much fun!!


I'm looking forward to the next installment.  Who knows what I'll be sharing then?


Tuesday, July 5, 2016

Day One.......

While this is not my first blog post, it is the first since I joined Stampin' Up. I am excited to be back in the world of paper crafting.  This is something I do to relax and unwind.  I also get to document my family history and make some really cute gift and 'thinking of you' items for friends.

I am participating in my first SU Demonstrator Swap next weekend.   This is not my usual color palette but I was lucky enough to use inks borrowed from Elizabeth.


I won't show my cards yet but I will share photos of the work in progress and some of the materials and supplies used.  Here goes:

Background

Cut pieces of Whisper White Cardstock into rectangles measuring 4" X 5.25".  This is one-fourth of an 8.5 X 11 sheet of cardstock trimmed by 1/4 inch on both the long and short sides.    I created the background by applying the three inks (lightest to darkest) using the mini ink blending tool.  With the tool, blend the inks together at the borders to allow for a seamless transition.  In this sample, I started in the lower right corner with Wisteria Wonder, used Sweet Sugarplum in the center and Perfect Plum in the upper left corner.  After making the initial application, take the applicators and blend the colors along the transition area.   

Next, spritz water from the small spray bottle.  Allow the ink to lift slightly.  Blot with a paper towel to remove the ink.  If desired, remove the pump from the bottle and use the end to flock water drops onto the paper and blot again.  Your paper should look like the photo to the left. 


Card Front Elements

While the background papers are drying, let's work on the paper used to make the die cuts on the card. Again, since I have not stocked my supply closet yet with SU products, I am using alternate methods to create colored paper.  To that end, mist a sheet of Whisper White cardstock.  Blot the Wisteria Wonder onto the craft mat.  Spritz it with water to create a watercolor type liquid.  Using the water brush, apply the Wisteria Wonder ink to the dampened card stock to create a very lightly colored cardstock. 

After this dries, cut each piece into something small enough to fit through the Big Shot (or Cuttlebug).  I cut my sheets in half to make them easier to use.  Using the Thinlits, cut one flower and four 'congrats'.  I cut one of the colored cardstock and three of white cardstock.


By now, your card background should be dry.  It's time to assemble your card front.  Using the Fine Tip Glue Pen apply glue to the back of the flower and place it to the top of the card front at a slight angle.  Meanwhile, using the fine tip glue pin again, glue the white 'congrats' in a stack and then attach the colored one on the top of the stack (to mimic a chipboard element).   That is placed at the bottom of the card and will look like this.


Stamping


Now, we are almost finished.  After placing the 'congrats' on the card, stamp 'so happy for you' just above it to the left.  This sentiment is from the Sunshine Saying set.  For this color combination, I used Tuxedo Memento Ink. 

 Finishing Touches
To add a little bling to this card, I added some tiny rhinestones along the stem near the flower.  It added just a little dazzle to this card. 
The final card is a top fold card. I made the base from Black Cardstock.  The card front is applied directly to the card base.  On the inside of the card, add a 4 X 5.25 piece of Whisper White cardstock to complete the card. 
And, there you have it.  A super easy, simple card that looks pretty impressive.