Monday, October 3, 2016

October Class Schedule


Good Morning!  It is finally October and in Arkansas, it has finally cooled off and the humidity pods have moved on.  There is nothing quite like the clear skies and crisp air on a fall morning.  I think this is one of my favorite times of the year.  It is amazing that the weather has such a powerful affect on our moods and everything else.  With fall in the air and the preparations for winter on the horizon, it is time to start thinking about finishing (or in some cases, starting) all of those project you were going to make for the holidays.

My October Class Schedule is posted below to help you get in the mood.  You will find four different dates that I am available to teach a Christmas Card Class.  If none of those dates work for you, call, text, or email me - we can get something scheduled.  Do you have a crafter on your Christmas list?  I have some great ideas for gift items as well.   Everything from a bundle of embellishments for stocking stuffers to a Big Shot to  help with all of your embossing or die cutting needs.  Give me a call, text,  or an email.  I will even offer to gift wrap for you.  What a deal?  Right?? 


Keep in mind, the October Specials - all month is the Buy 3, Get 1 Free DSP special. The current hostess code is G6PMDMWZ


Coming in November - my first On-Line Class.  How does that work, you ask?  Well, when I open the class, you can either order directly from my website a list of supplies you will need.  Everything will be shipped directly to you.  You will also receive a color pdf file of directions and tips & tricks to help you with your project.   If you are local, you can order from the website or we can coordinate and have a single package shipped to me.


Sunday, October 2, 2016

A Little Retreat Time....

 
What a great time we had at our recent Holiday Escape Crafting Weekend Retreat.  My upline's upline (my grand-upline?) hosted a wonderful weekend at the 4H center in Little Rock.  We were treated with goodies, make and takes, and prizes all weekend.  We started with Halloween.  Worked our way through the entire Holiday Catalog and ended with Christmas and a PJ Party.   We were even able to sneak in a celebration of Kay and Elizabeth's recent promotions to Gold and Silver.  Yay girls!  Good job!!  Elizabeth even made sure Kay got a tiara for her accomplishments.


The PaperMadePrettier Team is a wonderful group of ladies that I am excited to claim as part of my own tribe.  It seems that no matter what the topic or question, they are all so supportive.  I love this team!!


Here are some snap shots of the weekend - I was having so much fun and making so many cards, I didn't have time to take too many pictures. 

Speaking of the holidays - if you missed my recent Pinterest Party, you missed a great time.  Here are some pics of the cute cards and gift packaging we made.  Call me to schedule your own party, or two. 


Thursday, September 29, 2016

Come Celebrate With Me!


October 1, this Saturday, is National Card Making Day.   Too bad it's not a national holiday (as it should be).  To celebrate this big event, Stampin' Up! Is running some super awesome specials.

If you like Designer Series Paper half as much as I do, then this will be right up your alley.

The following products are being discounted (October 1-5 only):

ItemDescriptionDiscountRetail PriceSale Price
1383392015-2017 In Color Card stock15%        $8.00           $6.80
1414132016-2018 In Color Card stock15%        $8.00           $6.80
1416972015-2017 In Color Envelope Paper25%      $11.00           $8.25
1416982016-2018 In Color Envelope Paper25%      $11.00          $8.25
133774Envelope Punch Board25%      $20.00        $15.00
141651Designer Tin of Cards Project Kit25%      $27.00        $20.25
129027Fast Fuse Adhesive Refill – Buy a Fast Fuse Adhesive (item 129026) and get a Refill for FREE!        $7.50         FREE 

AND.......
There is an awesome DSP sale.  Buy three and get one free for the entire month of October.  Head on over to my website to stock up on DSP and other necessities.  

One more thing.....you have a few days left to take advantage of the Paper Pumpkin BOGO special.  Buy one month by October 10 and get the second month for free. 

Wednesday, August 31, 2016

Catching Up with Stampin' Up!

Wow!  We have made it through two weeks of school here.  Things are finally starting to calm down and get back into a 'normal' routine.  Part of my new normal is remember to post to my blog.  I had great plans for regular posting and weekly (or more often) updates.   Alas, that is an area for which I still need to make significant improvement. 

I am happy to report that I have made some improvement in the arena of photographing my samples for the blog.  The weekend before school started I spent a great afternoon with my upline and other team members.  I have gotten some awesome ideas for some upcoming classes.  There are some cute items and ideas coming out in the Holiday Catalog that goes live on September 1.   

Now, on to the cards we made at card class on August 11.  This was the "Last Days of Summer" Card Class.  Remember, card class is the second Thursday of the month.  The next Girls Night Out Card Class is September 8.  The cost is $15 for six cute cards (or free with a minimum purchase).   I will list the colors and the stamp sets used for the following cards.  You can shop 24/7 from my website

 Card #1: BE YOU{TIFUL}

This card is made with Dapper Denim, Sweet Sugarplum, Peeakboo Peach, Flirty Flamingo, and Emerald Envy inks.  Papers are Dapper Denim and Whisper White.  The ribbon is Sweet Sugarplum..  If  you noticed that these were the five 2016-2018 In Colors, you get a prize. 

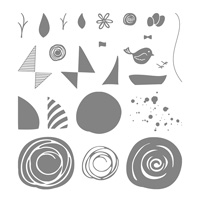
The stamp set used was Flower Patch Photopolymer.  This is a VERY versatile set of stamps with multiple flowers and great sentiments.  Members of the Card Class learned how to use regular post-it notes as a mask to allow layering of the stamps, providing depth of the overall image. 

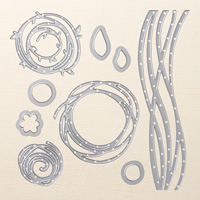
This stamp set comes with the matching Flower Fair Framelits dies which makes it super easy to cut these out for additional layering.  Here is a photo that uses these stamps and dies for a true dimensional experience.

The colors used for the images were Flirty Flamingo, Peekaboo Peach, Sweet Sugarplum, and Emerald Envy.  The card is made of Dapper Denim with a Whisper White front.  The pennant is from Peekaboo Peach and Emerald Envy Card Stock.  It was all finished off with the In-Color Enamel Shapes and Sweet Sugarplum Ruched ribbon.

Card #2 - You're the Best

 The next card was a little more simple in terms of techniques and supplies.  You all know that I am a sucker for cute background paper - you know, I'm gonna' save a LOT of money making my own background papers........   Well, not so much.  Instead, I was able to use those techniques to make one of my new favorite cards.  For this one you will use......

Playful Backgrounds Stamp Set
Watercolor Words Stamp Set
Flirty Flamingo Card Stock
Whisper White Card Stock
Flirty Flamingo Ruched Ribbon
Flirty Flamingo Ink
Flirty Flamingo Designer Series Paper

Stamping:


Step 1 - Use the solid dots, stamp off on scrap paper to lighten the image.  Stamp the solid dots on a piece of Whisper White that is approximately 5.25 inches tall and two inches wide. 
Step 2 - Use the open dots and stamp on top.  This is a great way to add some color to your paper --- but not too much. 
Step 3 - I finished off the card with the tag cut by hand (2/3) and trimmed to shape.  Simply back the tag with the Designer Series Paper and add a ribbon.  This basic card can be replicated any number of ways depending on the color combo and the sentiment you want to use. 
.


Card #3 - For You

I worked to keep my cards for this class within the 2016-2018 In Colors.....in retrospect, I think this led to this card being too dark.  However, onward and upward.  I am ashamed to admit that I did not retain the name/link for the original posting of this card.  It is incredibly simple but can be dressed up so much more than what is shown here. 

As you can tell it is a simple, A2 card (half of an 8.5" x 11") with a side fold.   The actual card base is Whisper White Card Stock.  After making the base, you will trim 3/4 inch from the front of the card.  The card front is Dapper Denim cut at 5.5" X 3.5".  This is the same as a quarter page cut, with 3/4 inch trimmed from the long edge.  

Stamping:

1. Using a small motif, stamp in one or multiple colors on the 'inside' of the card along the long edge that will show when the card is closed.  This sample used the Swirly Bird set for this part.  When stamping along this edge, be sure to stamp off the edge some and stamp slightly to the inside of the card so the pattern continues to the inside of the card behind the card front.   

2.  Stamp your sentiment of choice using Dapper Denim on a piece of Whisper White Card Stock.  This sentiment comes from the Thoughtful Branches stamp set (limited availability).  At the same stamp the leaves from the ___ set using Emerald Envy ink on Emerald Envy Card Stock. 

3.  Using your Big Shot and the Flower Fair Framelits Dies, cut one of the flowers out of Whisper White being sure to include all of the sentiment.    Also cut the two leaves from the Emerald Envy you stamped in the previous step.  

4.  Attach the piece of Dapper Denim to the card front.  Tie a short length of Sweet Sugarplum Ruched Ribbon with a single knot.  Attach that to the card using a glue dot, leaving the ends of the ribbon until you have built the remainder of the card. Using Stampin' Dimensionals, attach the Whisper White flower on top of the ribbon, affixed to the card base.  Then, tuck the two leaves up under the flower and attach with Snail Adhesive

5.  The final step is to embellish the card with the 2016-2018 In Color Enamel Shapes.  Trim the ribbon ends. 


Thursday, August 4, 2016

New - From Stampin' Up! Thoughtful Branches and a Holiday Sneak Peek


This is a new, exclusive stamp and die bundle that you will LOVE!  I ordered this last week and I can’t wait for it to arrive.  In the meantime, I have to browse ideas and samples online.  Let me tell you something - They are gorgeous! You will not want to miss the opportunity to get your hands on this. 


While you are browsing and adding to your wish list, be sure to save some space for the awesomeness that is our Holiday Catalog.  I had the chance to preview the catalog last week.  Take a peek at these images of projects that you, YES YOU, can make with items from the Holiday catalog. 


Call me if you are interested in learning more about stamping, card making, or memory keeping.   I would love to help you!!!


Sunday, July 24, 2016

Momma said there'd be days like this....


We have a 'rule' at our house that goes something like this.....don't start anything after 9:00 PM.  That means we don't start cooking, watching a movie, or balancing the checkbook after that time.  Well, I violated that rule last week as I was excited to get into my craft space and create some cards. (Love how Stampin' Up makes you think that way.). 
 
I had worked the previous evening on using some of my old non-SU paper to make some cards.  Let me tell you, there are not enough words to describe the difference in great paper (SU) and not so great paper - but I'll try all the same:
 
  • Great paper doesn't tear after it has been scored
  • Great paper doesn't allow the inks to bleed, giving a messy result
  • Great paper allows beautiful ink  colors to retain their integrity
So, with that being said, your paper quality makes all the difference in the finished product.


Once I learned my lesson about paper quality, it was on to creating more cards.   I love the Swirly Bird Stamps and Thinlit Bundle.  It is going to be so much fun creating with these.


My next project was with the Sunshine Sayings Stamp set.  So clean, so simple, so elegant.  I combined it with another set for a thankful sentiment.  I tied around the sentiment, some bakers twine from my stash.  Loved it so much that I made a second one.   But, that's when the troubles began.  


Links to order these stamps are at the bottom of this post.  Please click through to order from my website.  
 
As you can see, with my excitement, some things were misplaced.  Typically, you can correct those mistakes if you find them as soon as you make them.  But, I  didn't notice it until the next morning.  So, one of my lucky friends will be getting this 'special' card.  Wonder who it will be?

Until next time....happy crafting!  ðŸ˜„   Next Up - Two card kits.  I will time myself making these and let you know the results.  Should be fun!!

P.S. - I'm working on my formatting skills.   Hope to be better soon.  

Swirly Bird Photopolymer Bundle   Swirly Bird Photopolymer Stamp Set   Swirly Scribbles Thinlits Dies
Swirly Bird Bundle                            Swirly Bird Stamps                   Swirly Scribbles Thinlits Dies


Sunshine Sayings Clear-Mount Stamp Set
Sunshine Sayings

Sunday, July 10, 2016

The Big Reveal...

I finally remembered to add this photo to my blog   It is my first SU swap.   There were some exquisite samples in the Paper Made Prettier swap this month.  My work is cut out for me - that's for sure.  


How many people can say they had fun at a training session?  I did on Saturday at our team training event.   Kay, Elizabeth, Patience, and Cindy did an awesome job with everything.  Thanks!!


After I finished my swap cards, I made a few more while I had the ink and stamps out. These two feature the Watercolor Words Stamp Set.  So much fun!!


I'm looking forward to the next installment.  Who knows what I'll be sharing then?


Tuesday, July 5, 2016

Day One.......

While this is not my first blog post, it is the first since I joined Stampin' Up. I am excited to be back in the world of paper crafting.  This is something I do to relax and unwind.  I also get to document my family history and make some really cute gift and 'thinking of you' items for friends.

I am participating in my first SU Demonstrator Swap next weekend.   This is not my usual color palette but I was lucky enough to use inks borrowed from Elizabeth.


I won't show my cards yet but I will share photos of the work in progress and some of the materials and supplies used.  Here goes:

Background

Cut pieces of Whisper White Cardstock into rectangles measuring 4" X 5.25".  This is one-fourth of an 8.5 X 11 sheet of cardstock trimmed by 1/4 inch on both the long and short sides.    I created the background by applying the three inks (lightest to darkest) using the mini ink blending tool.  With the tool, blend the inks together at the borders to allow for a seamless transition.  In this sample, I started in the lower right corner with Wisteria Wonder, used Sweet Sugarplum in the center and Perfect Plum in the upper left corner.  After making the initial application, take the applicators and blend the colors along the transition area.   

Next, spritz water from the small spray bottle.  Allow the ink to lift slightly.  Blot with a paper towel to remove the ink.  If desired, remove the pump from the bottle and use the end to flock water drops onto the paper and blot again.  Your paper should look like the photo to the left. 


Card Front Elements

While the background papers are drying, let's work on the paper used to make the die cuts on the card. Again, since I have not stocked my supply closet yet with SU products, I am using alternate methods to create colored paper.  To that end, mist a sheet of Whisper White cardstock.  Blot the Wisteria Wonder onto the craft mat.  Spritz it with water to create a watercolor type liquid.  Using the water brush, apply the Wisteria Wonder ink to the dampened card stock to create a very lightly colored cardstock. 

After this dries, cut each piece into something small enough to fit through the Big Shot (or Cuttlebug).  I cut my sheets in half to make them easier to use.  Using the Thinlits, cut one flower and four 'congrats'.  I cut one of the colored cardstock and three of white cardstock.


By now, your card background should be dry.  It's time to assemble your card front.  Using the Fine Tip Glue Pen apply glue to the back of the flower and place it to the top of the card front at a slight angle.  Meanwhile, using the fine tip glue pin again, glue the white 'congrats' in a stack and then attach the colored one on the top of the stack (to mimic a chipboard element).   That is placed at the bottom of the card and will look like this.


Stamping


Now, we are almost finished.  After placing the 'congrats' on the card, stamp 'so happy for you' just above it to the left.  This sentiment is from the Sunshine Saying set.  For this color combination, I used Tuxedo Memento Ink. 

 Finishing Touches
To add a little bling to this card, I added some tiny rhinestones along the stem near the flower.  It added just a little dazzle to this card. 
The final card is a top fold card. I made the base from Black Cardstock.  The card front is applied directly to the card base.  On the inside of the card, add a 4 X 5.25 piece of Whisper White cardstock to complete the card. 
And, there you have it.  A super easy, simple card that looks pretty impressive.